• Video
  • Shop
  • Culture
  • Family
  • Wellness
  • Food
  • Living
  • Style
  • Travel
  • News
  • Book Club
  • GMA3: WYNTK
  • Newsletter
  • Privacy Policy
  • Your US State Privacy Rights
  • Children's Online Privacy Policy
  • Interest-Based Ads
  • Terms of Use
  • Do Not Sell My Info
  • Contact Us
  • © 2025 ABC News
  • Living

These candy spoons make eating twice as fun

0:47
These candy spoons make eating twice as fun
ABC News
ByZoe Moore
Video byNidhi Singh and Elissa Nunez
October 21, 2019, 8:09 AM

Tie dye candy spoons are an easy DIY to sweeten any food you eat with a spoon.

It's a great item to stick in a kid's lunch box or give to your friends.

In just four easy steps you'll have fun edible spoons.

Editor’s Picks

We got a professional slime-making tutorial with the 'Queen of Slime'

  • Jun 18, 2019

Unwind for the holidays with these DIY all-natural skin care products

  • Dec 25, 2018

Impress your friends with this DIY chalkboard tray

  • Oct 14, 2019

1. What you'll need

Supplies to make colorful candy spoons.
ABC News

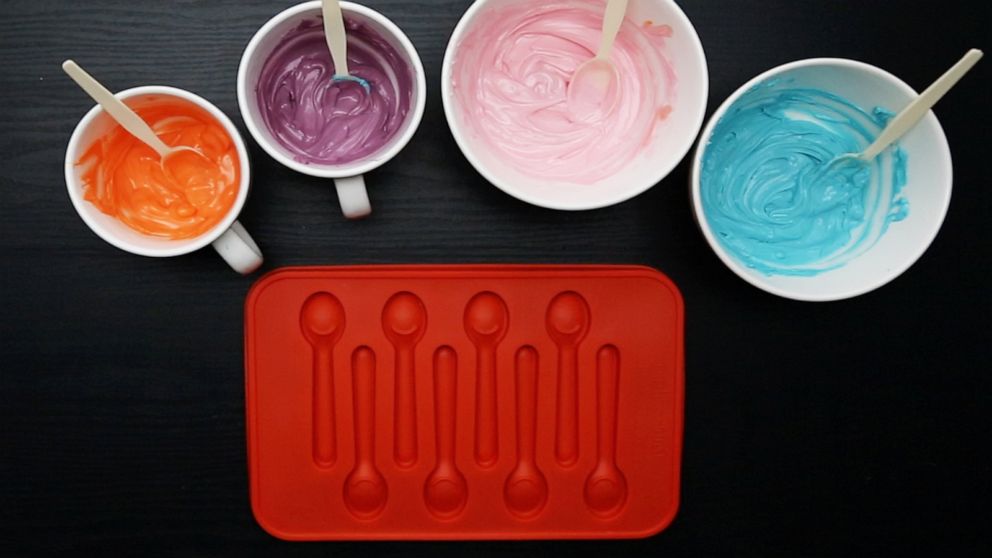
Making candy spoons is super simple -- it's a craft you can do by yourself or with younger kids.

  • Different colored candy melts
  • Silicon spoon mold (We got ours from Pampered Chef.)
  • Microwavable bowls

For extra fun choose the colors of candy melts based on the holiday or occasion.

For Halloween use black and orange candy melts for some spooky fun.

2. Melt the candy

Melt each color candy in separate bowls according to the directions on the packaging.

Related Articles

(MORE: How this couple turned their love of DIY into their side hustle.)

3. Fill the mold

Drizzling melted candy into silicon spoon mold.
ABC News

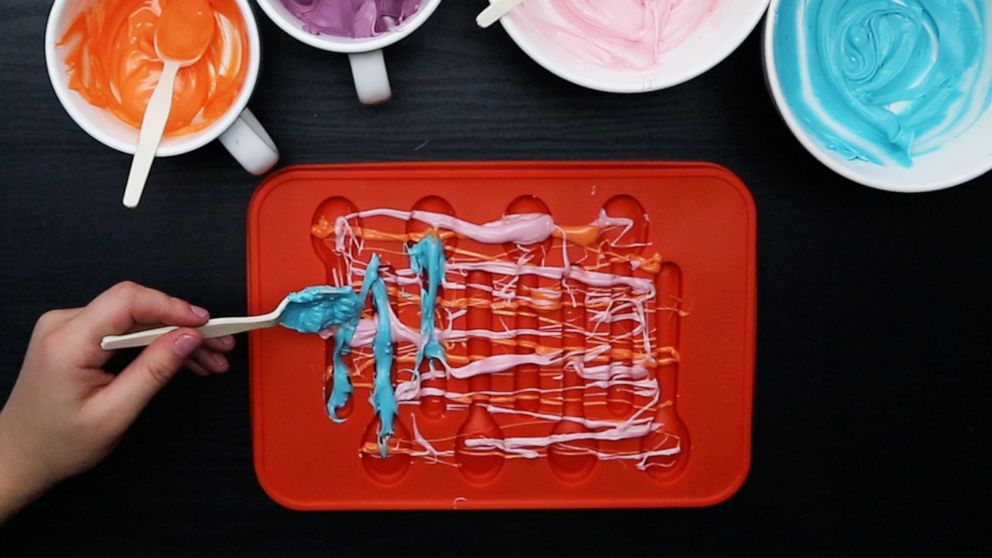
Drizzle the melted candy into the silicon spoon mold.

Fill the mold to the top.

It's OK to be messy -- you can just clean it up afterwards.

TIP: If you want to be more precise put the melted candy in a pastry bag.

4. Remove the spoons

Wait for the spoons to completely harden and then gently push out of the silicon mold.

For faster results place the silicon mold in the refrigerator.

Related Articles

(MORE: How to make your own rustic and romantic place cards.)

5. Eat your creations

DIY Story
ABC News Photo Illustration, Getty Images

Use your candy spoons to eat things like yogurt, cereal, ice cream and pudding.

Editor’s Picks

We got a professional slime-making tutorial with the 'Queen of Slime'

  • Jun 18, 2019

Unwind for the holidays with these DIY all-natural skin care products

  • Dec 25, 2018

Impress your friends with this DIY chalkboard tray

  • Oct 14, 2019

Up Next in Living—

Summer solstice 2025: When is the 1st day of summer?

June 16, 2025

June's full strawberry moon: See photos and what it means for your zodiac

June 11, 2025

High school athlete somersaults to track and field championship win

June 10, 2025

Michaels buys Joann brand, plans to expand crafting supply to meet demand

June 6, 2025

Shop GMA Favorites

ABC will receive a commission for purchases made through these links.

Sponsored Content by Taboola

The latest lifestyle and entertainment news and inspiration for how to live your best life - all from Good Morning America.
  • Contests
  • Terms of Use
  • Privacy Policy
  • Do Not Sell My Info
  • Children’s Online Privacy Policy
  • Advertise with us
  • Your US State Privacy Rights
  • Interest-Based Ads
  • About Nielsen Measurement
  • Press
  • Feedback
  • Shop FAQs
  • ABC News
  • ABC
  • All Videos
  • All Topics
  • Sitemap

© 2025 ABC News
  • Privacy Policy— 
  • Your US State Privacy Rights— 
  • Children's Online Privacy Policy— 
  • Interest-Based Ads— 
  • Terms of Use— 
  • Do Not Sell My Info— 
  • Contact Us— 

© 2025 ABC News